8 Tips for Creating VSTS Tasks
Microsoft has made their VSTS (Visual Studio Team System) build system very flexible. It doesn't matter if you host it on-premise or in the cloud, you can easily extend out functionality by importing existing custom tasks through the marketplace or write your own custom tasks.
By default, the custom tasks that you can create will only be available to your company. But having this flexibility really helps with automating manual steps in your process. The custom tasks are shared across all projects which make it very easy for any team and project to make use of them when they are ready to go. I've created several custom tasks for VSTS for Farm Credit Services of America and I have put together some tips and tricks to help anyone get started.
Background
At Farm Credit Services of America, we make use of VSTS in the cloud but have on-premise build agents. The build controller itself lives in the cloud, it communicates to the on-premise build agents. This allows us to offload maintaining version control and build controllers but still get a lot of flexibility in our builds. We have created custom build steps to support a number of processes, from deploying SSIS databases to deploying to ActiveBatch, to creating Octopus Deploy releases.
VSTS allows you to write your custom task in JavaScript (useful when supporting cross platform on Linux or MacOS), or PowerShell (when the agent can run on Windows). Being able to write something in PowerShell is, for lack of a better term, frickin awesome. Coming from C#, the syntax takes a little bit to get used to, but I have yet to run into a scenario where PowerShell is missing a feature.
Tip #1 - Start With a Simple Script Locally
One of my colleagues at Farm Credit Services of America, Jeff Bramwell, wrote a great article on the basics of creating a VSTS Task. Microsoft made it a straight-forward process. However, there are several steps involved just to upload a VSTS task. If you just want to update a task you first must update the version number in the task.JSON file, log in using the tfx cli, navigate to the task and upload it. Imagine doing that every single time you wanted to make a fix. It gets old very fast. In addition, there is some very specific syntax to access variables you will need to know about. When you are just getting started on a new VSTS task all of this will slow you down.
My recommendation is to write the PowerShell script locally using your IDE of choice. Hardcode variables (make a comment indicating they are hard coded). Get the PowerShell working exactly how you want it to on your machine. Believe me, once you get the task up to the cloud you will go through a number of iterations, but you will go through a lot more at the start.
Tip #2 - You can never have too many Write-Hosts
VSTS will display anything sent to the Write-Host cmdlet. This is a must because once the PowerShell is executing on the server you have no idea what it is doing.
At a minimum add a Write-Host for the following scenarios
- List out all the input parameters
- At the start or end of a loop
- When the script is connecting to an external source (file system, database, etc)
- Inside the results of an If/Then statement
- Whenever the script is about to make a change to anything
This will make debugging a heck of a lot easier. It will allow you to open up the PowerShell file and see exactly where the problem happened.
Tip #3 - Create What-If Functionality
If your build task is going to be changing anything (deploying to IIS, creating new files, updating a database, etc.) then it is absolutely important to build in what-if functionality. Some of our VSTS tasks like to run an update T-SQL statement. That is wrapped in a transaction and uses the output clause. For the what-if functionality, the transaction is rolled back. We could then review the output statement and see what was about to happen. This will allow you to run the script on VSTS without the potential of ruining anyone's day.
Tip #4 - Use the run PowerShell Script Task
VSTS has a built in PowerShell Script task. This task can either run a PowerShell file or an inline script. The file is easier to work with because you can also run it locally. If you use the inline script function you would have to copy/paste the script into the IDE and the browser. And then back to the browser when you finish making the change in the IDE. Yuck.
The PowerShell running in this task has full access to all the variables built into VSTS as well as the ability to accept input parameters. This is exactly the same as the custom VSTS task.
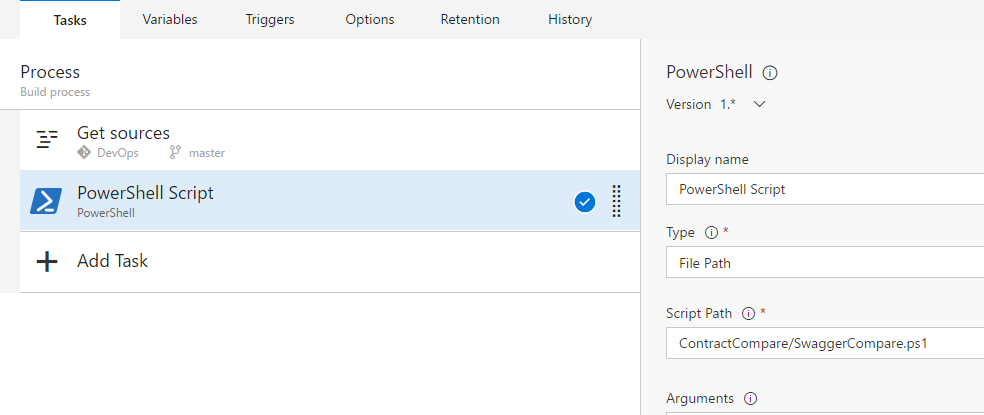
Create a new build that just runs the PowerShell file you created. Replace any of the hardcoded variables with input parameters and/or build variables. Doing this will allow you to go through another set of iterations on your script without having to go through the whole process of updating a VSTS task. I can't tell you the number of times I added a Write-Host or made some tweak to a script at this stage.
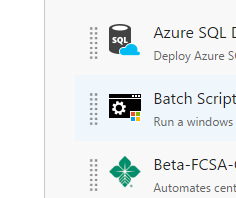
Tip #5 - Create the VSTS Task with the Prefix Beta in the Name and help Markdown
Following Jeff's Article create your VSTS task and upload it. My only tweak to that article would be to add a Beta prefix to the name and add a note letting others know you are still working on the task.
This will prevent the inevitable email asking what the task is about and why it is not working as expected. Hopefully, by this point, your VSTS task won't require very many iterations.
Tip #6 - Dogfood it / Beta Testers
Add the custom VSTS task to your team's process for a little while before notifying the rest of the developers in your company about it. Once you feel comfortable with it add it to a couple of other projects to help beta test it.
Tip #7 - Create a Sample Build
Create a sample build showing usage of the new task. This is needed because you can't clone a build between projects, but it helps out so other can see how it is used. When you notify the rest of the developers in your company about it include a link to the build. Also, include a link to the sample build in any documentation. Keep the sample build up to date as you update the task. Heck, use the sample build as the test build anytime a change made to the VSTS task.
Tip #8 - Create a New VSTS Task Without the Beta Prefix
All projects using the VSTS task will automatically be upgraded anytime you make a change. Create a new VSTS Task without the Beta prefix so you can still have the freedom to experiment with the beta VSTS task. The last thing you would want to do is mess up and stop teams from being able to run their builds.
Conclusion
My hope is these tips and tricks help you on your path to creating your own VSTS tasks. One item to note, once you create a VSTS task you and your company will be responsible for maintaining it. Before getting started on your own VSTS task check out the VSTS Marketplace to ensure what you are about to create hasn't already been created. In lots of cases, many companies (Octopus Deploy, Redgate, Docker) have created their own VSTS tasks. Use those tasks whenever possible. This will free you up to work on the tasks which haven't been created.